2020-12-12 キッチンの蛍光管をLED直管ライトに交換してみた件 [長年日記]
キッチンの蛍光管を交換しても点灯しなくなったことから、どうやら安定器(スターター)が不調になってきているとアタリを付けました。
After replacing the fluorescent tubes in the kitchen, the lights no longer came on, and I considered that the ballast (starter) was apparently malfunctioning.

そもそも、この家を作った時には、LED電球という考え方すらなく、今のように蛍光管の代替となるLED直管ライトなどは、影も形もありませんでした。
When we built this house, we didn't even have the idea of LED bulbs, and there was no such thing as a straight LED light to replace fluorescent tubes as we know them today.
で、この機会に、スターターをバイパス(無視)して、LED直管ライトを接続できるように、回路を変更してやろうと思ったのですが、そもそも、蛍光管も、LED直管ライトも、その仕組みがよく分っていません(ネットの情報も、これといったものが見つかりませんでした)。
I thought I would take this opportunity to change the circuit so that I could bypass (ignore) the starter and connect the LED straight tube light.To begin with, I don't know much about how fluorescent tubes and straight LED lights work (I couldn't find any information about them on the Internet).
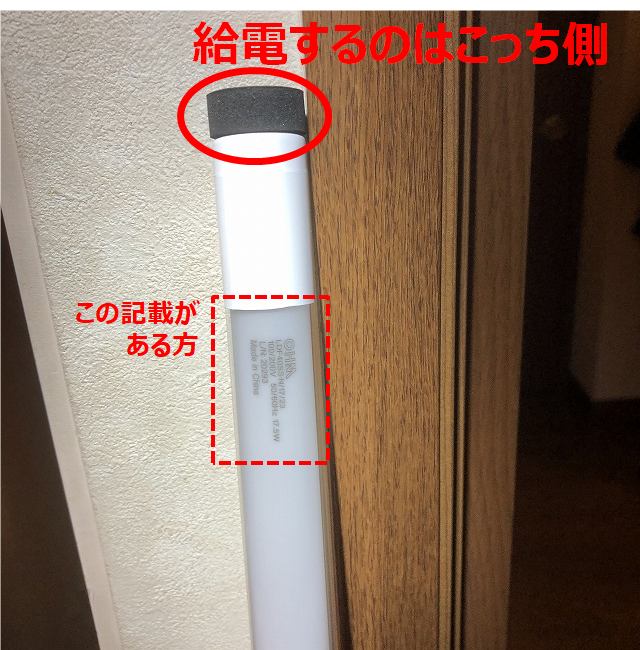
で、今回、「オーム電機 LED蛍光灯 直管形LEDランプ G13 40形 昼光色 グロー専用 LDF40SS・D/17/23」を使って調べてみました。
So, this time, I used "Ohm Electric LED Fluorescent Lamp Straight Tube LED Lamp G13 40 Type Daylight Color Glow Only LDF40SS-D/17/23" to check it out.
How should I connect the LED straight tube light?
これで、ざっくりと結線のやり方が分かりました。
Now you have a rough idea of how to connect the wires.
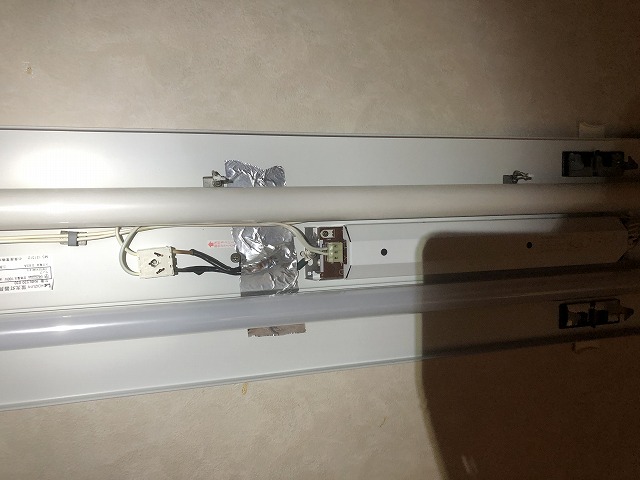
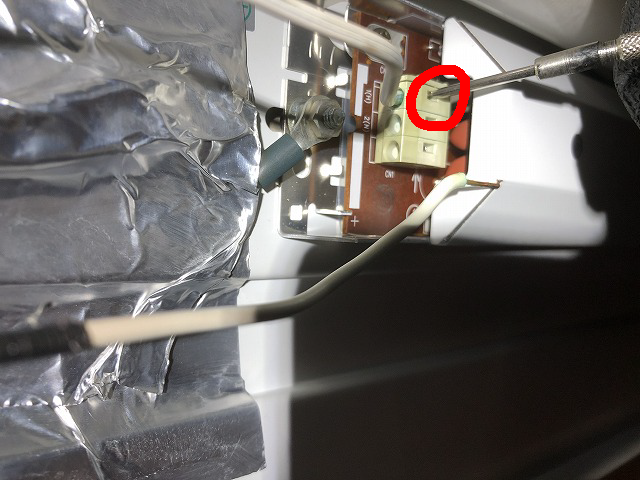
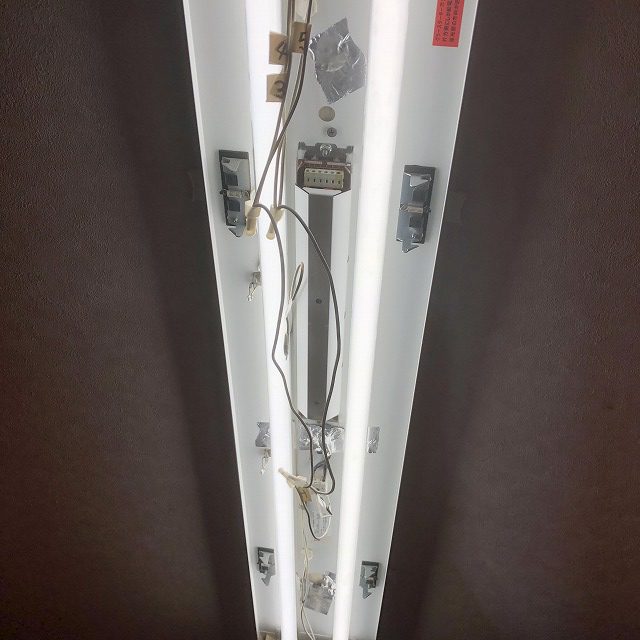
赤丸のところにマイナスドライバーを差し込むと、配線が外れました。
When I inserted a flathead screwdriver into the red circle, the wires came off.
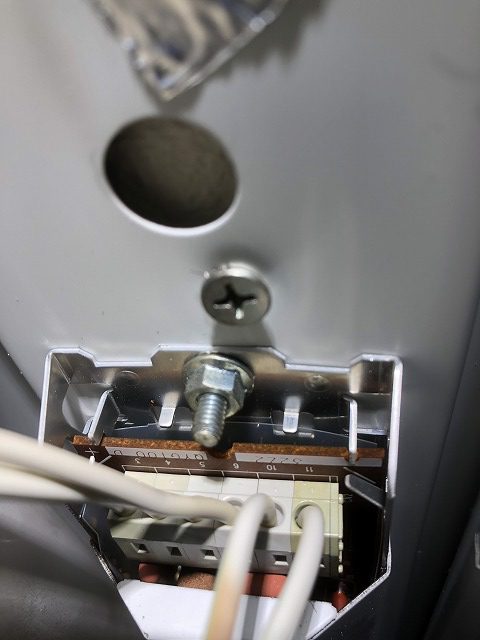
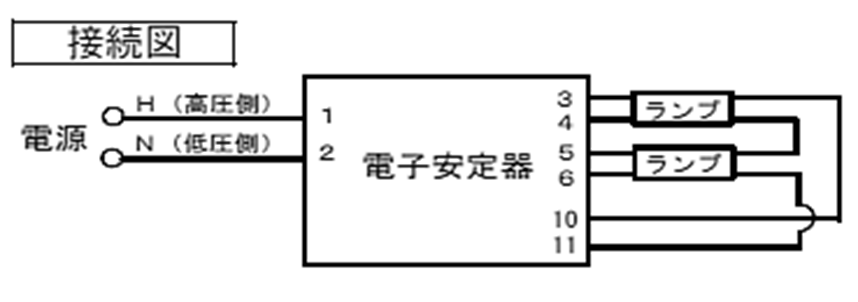
配線の番号はこのようになっています(ネットで仕様書を調べて、アタリを付けています)
This is how the wiring is numbered (I looked up the specs on the internet to get an idea).
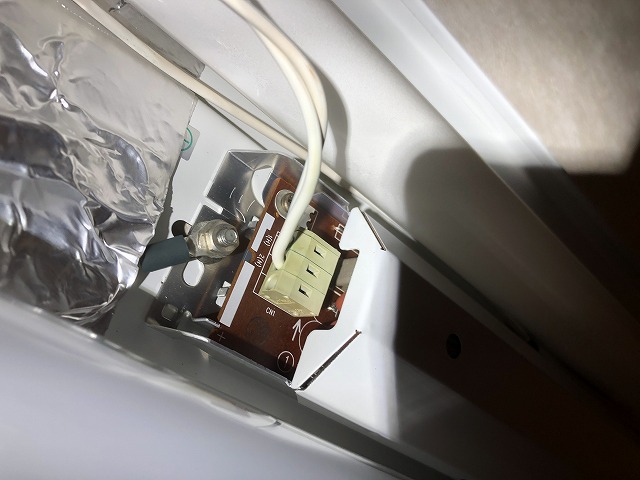
これを、以下のように変更します。電子安定器に接続された結線は、すべて外して(あるいは切断して)下さい。
Change this to the following.
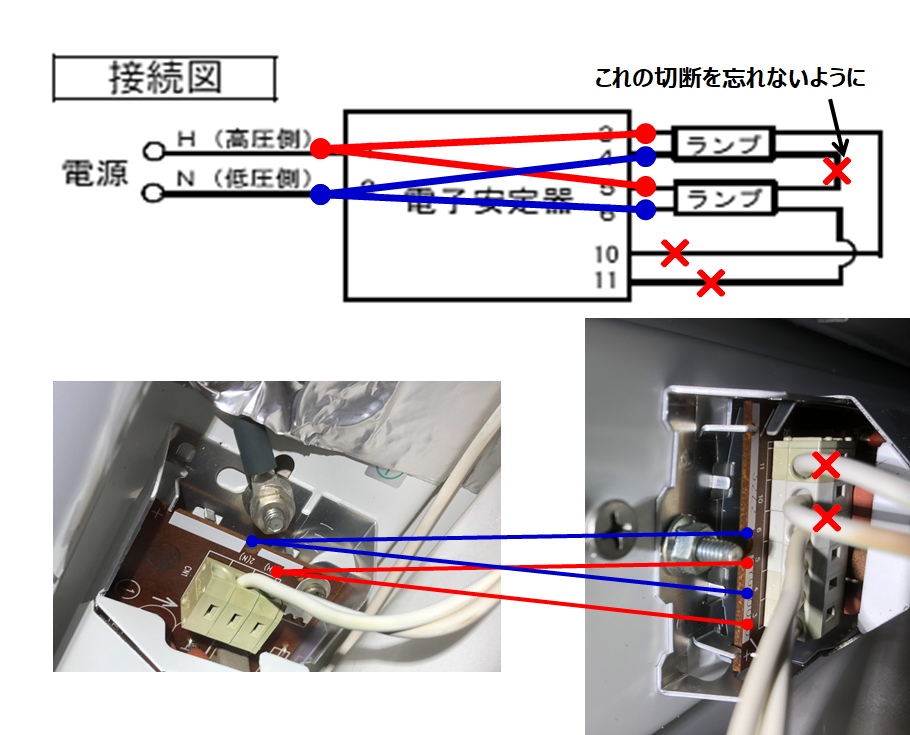
結線を外す前に配線の番号をタグ付けしておきます。
Before disconnecting the wires, tag the wires with their numbers.
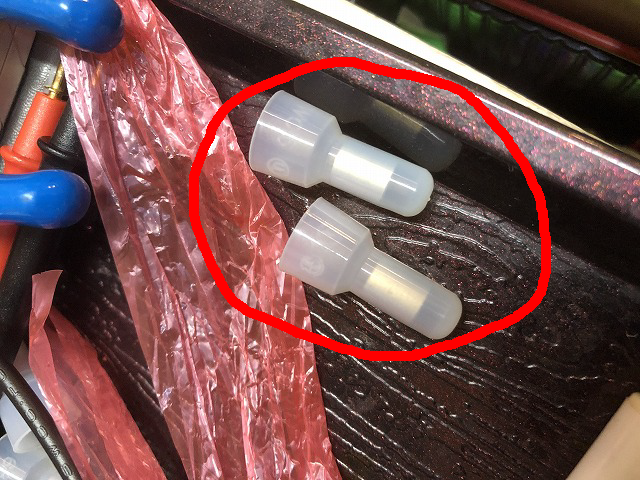
今回は、半田付けが難しかったので、こういう接合具を使って結線しました。外被を向いた動線を差し込んで、ペンチで金属部を押し潰します。
Soldering was difficult this time, so I used this kind of joining tool to connect the wires. Insert the dynamic wire facing the outer sheath, and crush the metal part with pliers.
結線して、点灯を確認しました。
I connected the wires and checked the lights.
これで、安定器(スターター)は不要となりました。待機電力の消費もなくなるので、少しは節電になるでしょう。
Now, the ballast (starter) is no longer needed. The standby power consumption will also be eliminated, which will save some power.
注意事項:LED直管ライトの方向を逆にするとショートします。映像の中で見たように、逆方向は短絡しているからです。結線の中にヒューズを入れておくべきです(私も今、気がつきましたので、後日対応しておきます)。
Note: If you reverse the direction of the LED straight tube light, it will short circuit. As you can see in the video, the reverse direction is because of a short circuit. You should put a fuse in the wiring (I just noticed this too, and I will take care of it later).